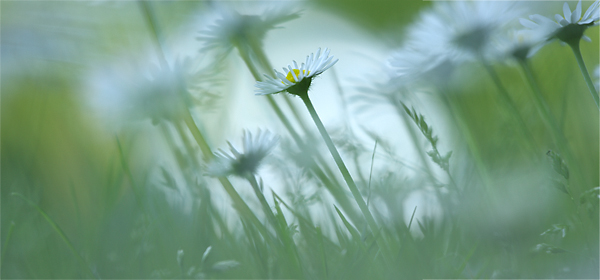
In the Field: I'm a big believer in the necessity of being able to consistently produce good images close to home. As I've often said, "If you can't make effective images near your home, you won't make them in more exotic locations either." This image is a case in point. It was made about 100 feet from my back door. English Daisies are only 2-3 inches tall. To make this close-up, panoramic image, I used a 70-200 mm zoom lens set at 200 mm, with a 25-mm extension tube placed between my Canon 40D camera body and the lens so that I could focus more closely. I steadied the camera on a bean bag, which was placed directly on the ground. I shot at a wide-open aperture of f/4 to take advantage of limited depth of field, and focused selectively on a single flower, leaving the rest of the flowers as reinforcing shapes. I lined up the in-focus flower with a white reflection of the sun off of my kids' old slide. I made two exposures, overlapping each by about 50% so that I could later combine the images into one file in Photoshop. While I was working, I was surprised by my neighbor, who was concerned something had happened to me after seeing me lie motionless on the ground for quite some time!
In the Computer: After loading the files into Photoshop CS, I opened a new document a little less than two times the width of a single flower image. Using the Move Tool in the floating palette, I dragged each image onto the new document. This automatically created two layers, one for the left-hand image on Layer 1, and one for the right-hand image on Layer 2. The task at hand was to line up the in-focus flower common to both images and blend the two layers together using a layer mask. With Layer 2 highlighted, I decreased its Opacity to about 50% so that I could see through it partially, and then lined up the flower petals on Layer 2 with those of Layer 1, residing directly underneath. I then clicked on the Add layer mask icon in the Layers palette, and returned the Opacity of Layer 2 to 100%. I set the foreground color to black in the floating palette, chose a medium-sized brush with medium edge hardness, and began to paint over the left-hand edge of Layer 2 until an even blending of Layers 1 and 2 was achieved. I lightened the image slightly using a Levels Adjustment Layer, and boosted the saturation using a Hue/Saturation Adjustment Layer, adding +16 to the Yellows and Greens channels.